

Fellblade Clean - 3a
Posts by Kugiini
-
-
-
I am basically looking for three different things.
On the one hand, I want to enhance my collection of Req 8 Gold Insc. Swords. I'm currently in possession of 20 swords, most of which you can find in this thread here.
PostRE: Your Beloved Collections
Someone said, that Insc. q8 Swords are back to the liking of people? Let me show you the ones I own
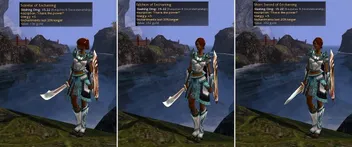

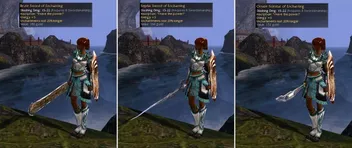
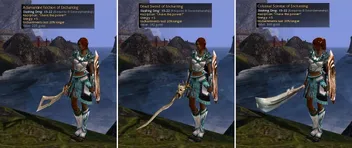
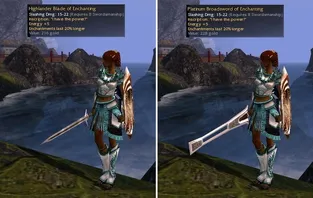
I hope you enjoy these  Kugiini
April 3, 2022 at 9:02 PM So if you happen to have a sword, that is not listed in the thread, feel free to PM me. I may do another post with an updated list, sine only 14 Swords are seen in the link
The second and a bit more specific thing I'm currently looking for to complete, is my Req 8 Gold Oni Blade Collection. With the increasing player base due to Reforged, I hope to see some of the missing swords to pop up.
Specifically, I'm looking for the following missing swords:
Req 8 Gold Oni Blade +20% Damage, while Health below 50%Req 8 Gold Oni Blade +20% Damage, while being hexed
Req 8 Gold Oni Blade (clean)
Last but not least, I want to enhance my collection of q8 Gold OS Swords with 15^Stance.
You can pm me with whatever you have and I will check the ones I already possess
Best regards
Kugi
-
DV30 - 20a
-
-
DV 1 - 4a
DV 2 - 4a
DV 3 - 4a
DV 4 - 4a
DV 5 - 4a
DV 6 - 4a
DV 7 - 4a
DV 8 - 4a
DV 9 - 4a
DV 30 - 5a
DV 31 - 5a
H27 - 2a
H73 - 2a
Kormirs Avenger
-
Not Sure if Thread still active
#32 75a
#21 35a
#23 5a
-
Round Shield 2wench 10ar tengu - 40e
-
-
Round 60a
-
Q9 dv Jade 10a
Kormirs Avenger
-
Round shield 40a
-
Zele 1 15a
Zele 3 15a
Kormirs Avenger
-
-
-
-
-
18a fds dual zeal
Kormirs Avenger
-
-
-
-
dual zeal fds 6a
Kormirs Avenger
-
FDS - Dual Zeal - 4a
ign: Kormirs Avenger
-
-
I would go up to 20a on #92
-
-
-
-
-
-
-
Dv3 30a
-
Dv3 27a
-
Bladed 5a
-
-
dv3 25a
-
-
NS107 20a
-
Ns107 10a
-
Dv3 21a