

Location: Nightfall, Domain of Fear. Start from Gate of Fear (NM/HM).
Skins drop: Ghostly Staff / Eternal Shield / Eternal Bow / Storm Bow.
Time: 1-2 minute(s) for 0-3 chest(s).
Introduction
The skins and attributes available for this chest run deserve an explanation. There are 5 green (unique) Ghostly Staves in Nightfall. 3 with attributes that do not exist in the Underworld and are new to the game for this skin when Nightfall was released in 2006 (Energy Storage, Soul Reaping and Inspiration). Since Terrorweb Dryders and the chests are associated with them, drop skins directly from the Underworld, created before the release of Nightfall, these 3 new attributes are not possible in this chest run. However, you can obtain them via the Zaishen Chest, which drops the five attributes corresponding to the green (unique) Ghostly Staves from Nightfall (Divine Favor, Spawning Power, Energy Storage, Soul Reaping and Inspiration). No other attributes for this skin drop from the Zaishen Chest.
The same goes for the Eternal Shield: only the Strength attribute requirement is possible. The other three attributes (Tactics, Motivation and Command) appeared later in the game. If you are interested in the low req. such as the Eternal Shield blue req.8 ar.16, you will need to kill Terrorweb Dryders in NM. The Gate of Pain mission would be a better option in this case (the first two groups can be grouped together and farmed solo). Only Ghostly Staff purple can be below req.9 in chests. With a lot of luck, in NM or HM, you can find something similar to this:
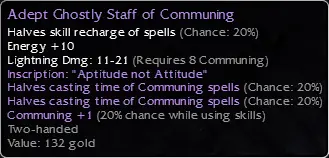
Note: Before update on official wiki by Looney with my help (2022) the information regarding the acquisition and attributes of Ghostly Staff was incorrect. For 21 attributs possible, 17 exist in inscribable version, except: Heal, Protection, Restoration and Fast casting, that never existed for this skin. In the no inscribable version, you must deduct the 3 attributes added at the release of Nightfall (Energy Storage, Soul Reaping, and Inspiration).
Preparation
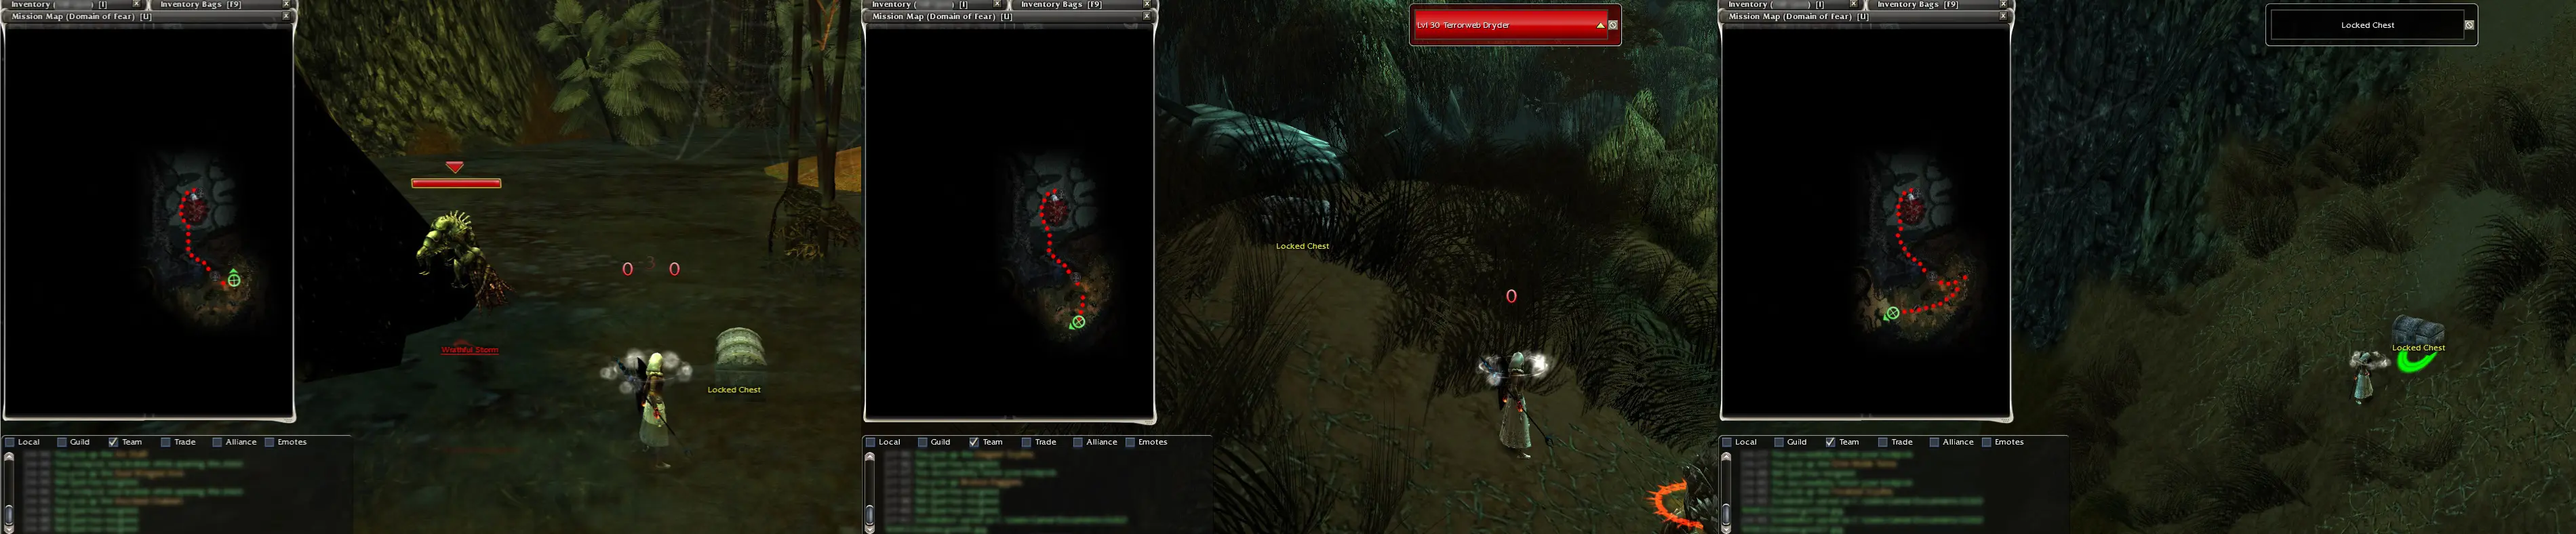
- The area with the highest concentration of Terrorweb Dryders in Nightfall with nearby chests (associated with Terrorweb Dryders and the skin that can be dropped by them) is located in the Domain of Fear, to the south/east.
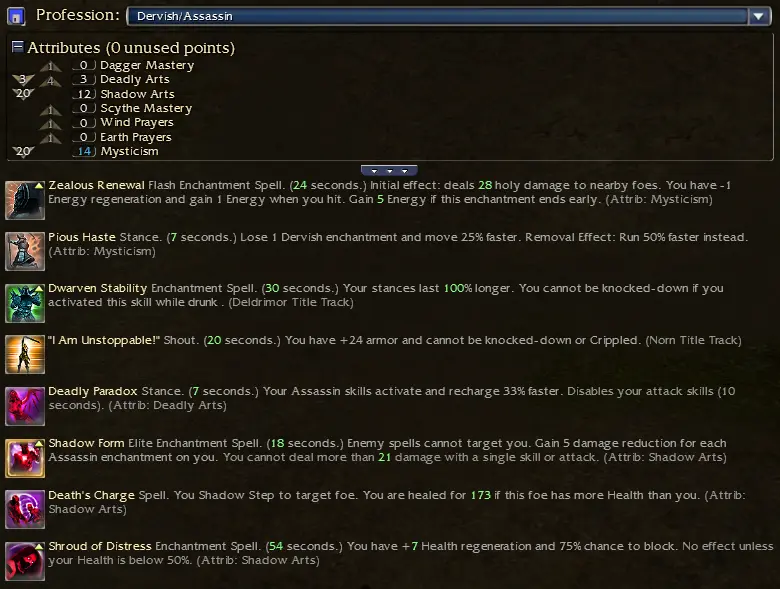
In this area, you will experience a slowing effect: Cower in Fear. In addition, Grasp of Insanity will use: Fingers of Chaos. For this reason, it would not be wise to use the following primary or secondary professions: Warrior, Ranger, Elementalist, Necromancer or Monk. Instead, use Assassin or Dervish. Personally, I use this build:
Chest run
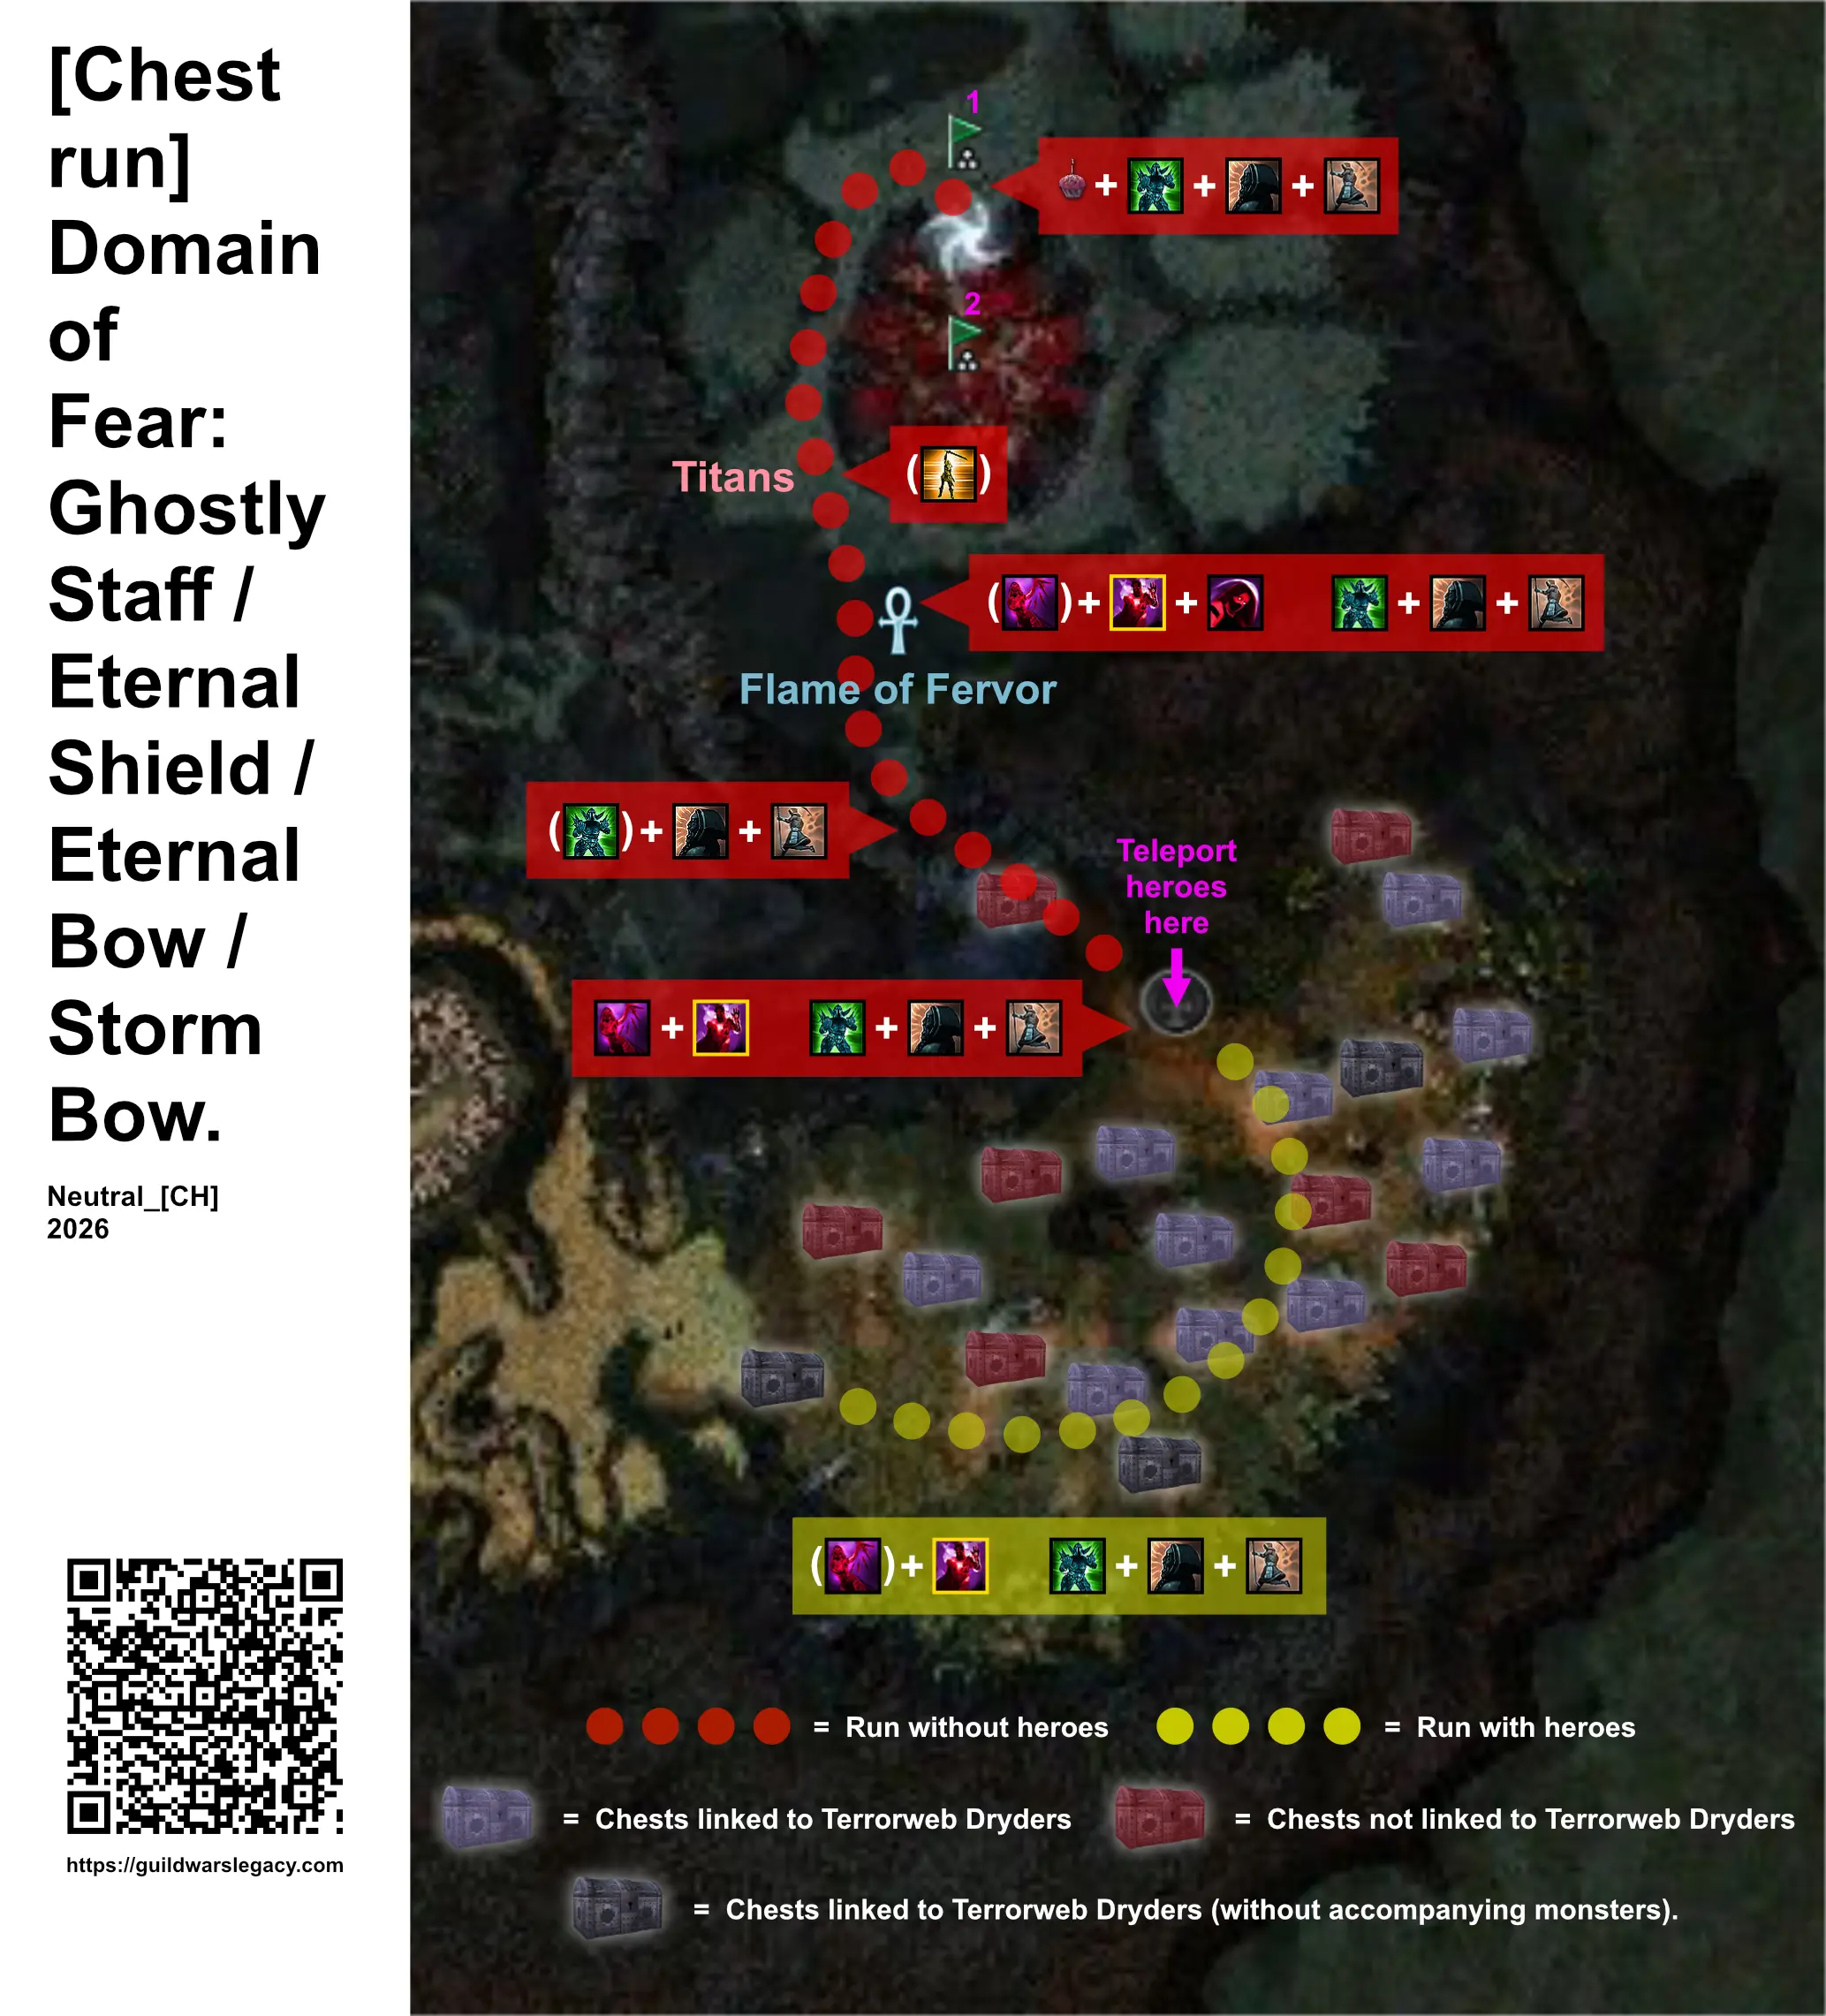
Information map:
Step by step:
- Go to the outpost: Gate of Fear and take the portal to: Domain of Fear.
- When you arrive in the area, place a flag for the heroes where you appeared (see video and map). You will call them later, if you take them at the beginning, they will die fast (Deep Freeze at the start of the chest run with Rain of Terror).
- Don't waste time, use: Birthday Cupcake, Dwarven Stability -> Zealous Renewal -> Pious Haste. The Birthday Cupcake in addition to Pious Haste greatly helps monster groups don't follow you (don't forget area effect: Cower in Fear). Go directly to the left and follow “the crevice" southward. The longer you wait, the more likely you are to be attacked by the group at the start of the area to the west.
- Use: I Am Unstoppable if the Titans cannot be avoided, otherwise you risk being knocked down (pass on their left if possible).
- Just before you are within earshot of the group with the monk boss: Flame of Fervor, check if one Arm of Insanity casts: Quickening Zephyr. (Depends on the composition of the group with the boss). Take advantage of the spirit effect to reload Shadow Form faster. Otherwise, use: Deadly Paradox + Shadow Form + Shroud of Distress. It is not mandatory to recharge faster or to complete the cycle of Shadow Form here, but it is faster for the following steps. However, having Deadly Paradox will be useful later to loop Shadow Form at least once.
- Ideally, if you are fast, you should pass the boss group and the next one to reach the Resurrection Shrine further south without being pursued by any monsters and without renewing Shadow Form.
- Once at the Resurrection Shrine, teleport your heroes there. Using the mission map [U], move the flag further south than where you placed it before. That is, to the other side of the teleportation gate (see video and map). Your heroes will then cross the portal and the game will teleport them to your current position. During these few seconds, take the opportunity to cast Deadly Paradox + Shadow Form + Dwarven Stability again.
- Open a chest associated with the Terrorweb Dryders if it is very close to the Resurrection Shrine. Then scan the eastern part starting from the Resurrection Shrine. Then move to the middle of the area and finally to the west (see video and map).
Note: Having already largely completed the titles: Treasure Hunter and Wisdom, I only open the chests associated with Terrorweb Dryders (see video and map). Depending on the situation, I use /resign towards the end of the run, west side, if certain chest appearances prevent the appearance of chests linked to Terrorweb Dryders (see map: red chests). Because the chests that appear during a run prevent those nearby from appearing as well. The video below shows a run practiced in this manner.
(The quality isn't great, I'll probably update the video, but it's better than nothing)
Three chests linked to Terrorweb Dryders will not be accompanied by or close to them when you see them. When you approach the location where they are, the Terrorweb Dryders will permanently move from their original position near the chest. You can sometimes observe this if you keep a close eye out. These chests are shown in gray on the information map: